
I have recently had a lot of K2 development on my hands. I came across an issue where I had to upload files to a custom table from a K2 Smart Form. I will show you step by step how accomplish this using K2 BlackPearl SmartForms and a custom database table without the use of SmartBox.
What I found was that when you create a table and import the table as a smart object, K2 fails to recognize image and VARBINARY fields. Instead we will create a NVARCHAR field to store the file data as binary.
Step 1: Create a table to store your files.
Create a new database using SQL Server. I’m calling mine K2Demo. Now we will create a new table; you can use the following script to create the table. Note that we have an ID column – INT (auto increment and primary key) and a FileData column (NVARCHAR(MAX)). The FileData column will be used to store the binary data of the file.
Script for FileData table:
USE [K2Demo]
GO

/****** Object:  Table [dbo].[FileDataDemo]    Script Date: 12/7/2013 3:04:21 AM ******/
SET ANSI_NULLS ON
GO

SET QUOTED_IDENTIFIER ON
GO

CREATE TABLE [dbo].[FileDataDemo](
	[Id] [int] IDENTITY(1,1) NOT NULL,
	[FileData] [nvarchar](max) NULL,
 CONSTRAINT [PK_FileDataDemo] PRIMARY KEY CLUSTERED
(
	[Id] ASC
)WITH (PAD_INDEX = OFF, STATISTICS_NORECOMPUTE = OFF, IGNORE_DUP_KEY = OFF, ALLOW_ROW_LOCKS = ON, ALLOW_PAGE_LOCKS = ON) ON [PRIMARY]
) ON [PRIMARY] TEXTIMAGE_ON [PRIMARY]

GO
Step 2: Add your database to the SQL service Instance
Now that we have our SQL table we can register our SQL database instance. Open the SmartObject service tester utility located at “C:\Program Files (x86)\K2 blackpearl\Bin\SmartObject Service Tester.exe“. Go to ServiceObject Explorer and right-click on SQL Server Service; click on Register ServiceInstance.

On the Add Service Instance pop-up, enter your database name and click next. On the next pop-up (Service Instance Information) enter the relevant information for your new instance. Leave the Guid as is and click add. Now your SQL service instance is created and we can continue adding the new SmartObject.

Step 3: Create the SmartObject from the table created
In the test utility go to SQL Server Service and locate the table you created in SQL.

Right click on your table and click on Create New SmartObject. In the new pop-up screen (Publish SmartObject) enter an appropriate name and choose the category. Note that in properties the FileData type is memo, we will change this in the next step. Once you are happy with your name and category click on Publish SmartObject and close the tester utility once you receive the message “Successfully added the SmartObject”

Step 4: Change the binary field column in K2 designer for the browser.
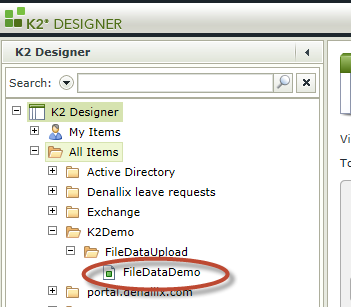
Open K2 designer. The URL should look something like this: http://SERVERNAME/designer/default.aspx and locate your newly created SmartObject.
Select your SmartObject and click on Edit. You will now see the list of columns under the property tab. Select the FileData column (1) and click Edit (2). Change the Type to File (3) and click OK (4).

Save the SmartObject by clicking on Finish.
Step 5: Create a view
you should still see the SmartObject page after you have clicked on Finish in the previous step. Click on “Generate a View” to create a view from the current SmartObject. We will be creating an item view and list view so click the two text boxes next to Item (1) and List (2) and click OK (3).

Step 6: Test solution
You will now have two new views in your category folder, one for item and one for list. Click on the item view (1) and run (2) the view. Add a new item and upload your image. Once done click on the list view (3) and click run. A list will show you the items you have added in the Item view. If you click on the file hyperlink it will ask if you want to download the file.

Hope you found this blog helpful.
Happy K2-ing!!
I ran into this same problem, thanks for taking the time to show us your solution. Do you know what is the maximum file size in using this method that can be stored?
Thanks. This is exactly what I need to do.
The next step is then to display the contents of the file that was uploaded to the database. Is there a way to have a SmartForm show the contents that were uploaded to the database? Or have something you click on that opens the contents in the application that the file is for. For example, if the file uploaded was a WORD doc, then is there a way to have something on a SmartForm that will then open the document in WORD?
Hi,
I’m a new K2 developer and I follow your solution and found some problem in my dev environment. My problem is when I run the view and browse file. It’s show file’s detail that’s correct.
But when I click “create” to save into database, there is no file found, the value in database is “scnull” (scnullscnull).
I try to use rule on “create” button clicked : “if fileData File Attachment does not contain a value” then “show a message to the user”. The result is message box alert every time I clicked “create”.
Why the file control (fileData) is not detect that I already browse file? What should I do?